
About Me
Hi, I'm Tyler, and this is Rubix Cubix Art where I make art from Rubik's Cubes. Below you'll find a little timeline of the history of my Rubik's Cube journey from where I started to my Rubik's Cube mosaics now.

My first Rubik's Cube
I first picked up this Rubik's Cube in 4th grade. I beat the heck out of this cube - as you can see in the picture - while I was figuring out how to solve it faster. I managed to get my fastest time down to 24 seconds on this cube.

7x7 V Cube
Somehow this was my second cube. Most people would go to a 4x4 next, then a 5x5, and so on. When I was in middle school I saw a youtube review or something with this in it (as V Cube was considered top-of-the-line at that time) and really wanted it. I distinctly remember sitting on Santa's lap to ask for a 7x7 V Cube. He didn't know what I was talking about, but I still got it for Christmas that year.

Speed Cubes
Sometime in middle school I moved on from the Rubik's brand cube to a stickerless speed cube. I lost every speed cube I had in middle school (three of them, I think), so the one in the picture is actually one I got in college.
As I used speed cubes and learned a faster method to solve, my record dropped quickly. It went from 24 to 18 to 15 all the way to 11 (with some other stops in between, but those ore the ones that stuck in my head), and stayed at 11 all through high school and some of callege. Then in college I got to 7 seconds, where my record remains today.

Twisty Puzzles
Sometime in high school I found other types of Rubik's Cubes besides the typical NxN cubes. I don't remember what my first on was, but during college, trying to get even faster at 3x3 became uninteresting so I started collecting other wacky puzzles that I could try to figure out on my own, called twisty puzzles.
Some of my favorites (left to right in the picture) are the 3x4x5, Time Machine, Mixup Cube, and (not really a twisty puzzle or in the picture, but...) blind solving 3x3.

Intro to Mosaics
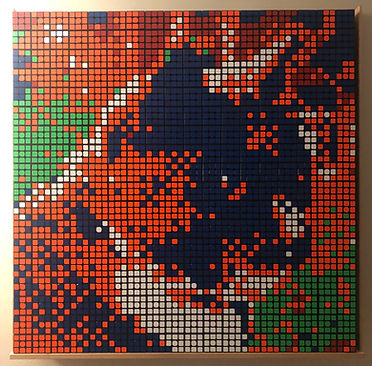
Short story: A friend and I wanted to start a Rubik's Cube club in college and had a grand idea to make the Colorado State University logo out of Rubik's Cubes for when we were tabling to advertise the club. It never happened, but we had already gotten 200 cubes. Now we each had 100 cubes to figure out what to do with. Obviously for me, I decided to make mosaics. Longer Story: In college, I met someone who was also into speed cubing, and at some point we had the idea to start a Rubik’s Cube club. I had seen Rubik’s Cube mosaics before and thought it would be a great idea to have a mosaic of the CSU logo while we were tabling on the plaza to advertise the club. So we bought 200 cubes. The club never happened, so we each wound up with 101 identical Rubik’s Cubes (there were 2 extra). What else do you do with 101 identical Rubik’s Cubes besides make mosaics? The picture is of my very first mosaic (sad it’s all grainy). It’s made from about 80 cubes because 200 cubes were shipped in 2 separate shipments several weeks apart. This was right before I left for thanksgiving break, so naturally I made a turkey. Now I know how many years I have been doing Rubik’s Cube mosaics by counting the number of Rubik's Cube turkeys in my camera role (and subtracting one since I made a turkey at year zero). I made the stand for this mosaic out of duck tape and cardboard I found in the recycling dumpster at my apartment (I think it was a pizza box). All I needed was a way to be able to lean the mosaic back as a unit and have supports on the side to keep them from falling over. I didn’t care about it looking nice at that time. Later I made a better stand with my grandpa out of scrap wood from my dad’s garage, then even more later he would make a really nice stand for me in his own shop that that I still use today.
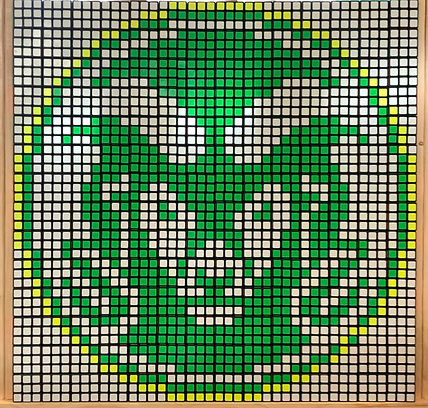
CSU Logo
I organized a Speed Cubing competition at CSU in my second-to-last semester there. I combined my cubes with the other 101 cubes of my friend that split the cost with me and we made the CSU logo at the checkin table! The world record holder attended the competition and got his picture taken next to our mosaic. That was pretty cool.
Better Mosaic Cubes
After I graduated college and moved into a rental house, I hung up the fancy mosaic board my grandpa made for me. It was capable of holding 324 cubes and I had 150 ish. I started looking at getting more to fill it. I didn't really want to get more of the some ones I had because the colors were a little wonky: yellow was hard to distinguish from white, blue was too light, orange was super bright, white stickers starting to turn yellow. So I found this company called Twist Pixel that tried out all sorts of Rubik's Cubes and found the ones with the best colors. I liked the colors, and I like supporting small businesses, so I got those and still buy from them. This is the first mosaic I made with those cubes: my family cat, Bullet.

Art Studio
324 cubes wasn't enough, and I didn't have enough space at my rental a bigger display, so found an art studio I could rent at Continuum Art Studios. This is the first big mosaic I made: Edna Mode from The Incredibles made from 783 cubes. I had the pleasure of having one of my brothers and several friends help. None of my friends know how to solve a Rubik's Cube, but it was still fun to just hang out even if they only managed to put up a few cubes.

First Sales
Continuum Art Studios hosted its first open studios not long after I started renting there. I participated but didn't have anything to sell, and the amount of interest I got in my art prompted me to create this website, get some business cards, and start selling. The next time the open studios came around, I had a few small items available for sale, and I made a couple sales: a heart, and a Christmas tree!


Higher Quality
Higher quality in terms of the woodworking. All the stuff I had built up to this point was pretty mediocre. I generally used 5 pieces of unfinished wood: plywood for the back and four straight cuts for the frame sides. With this piece, I inset the plywood into the frame so it wasn't showing and used cubes in the corners since I was having trouble getting the corners of the frame to meet at exactly 45 degrees when cutting on my dad's old miter saw. I also stained the wood instead of leaving it raw.